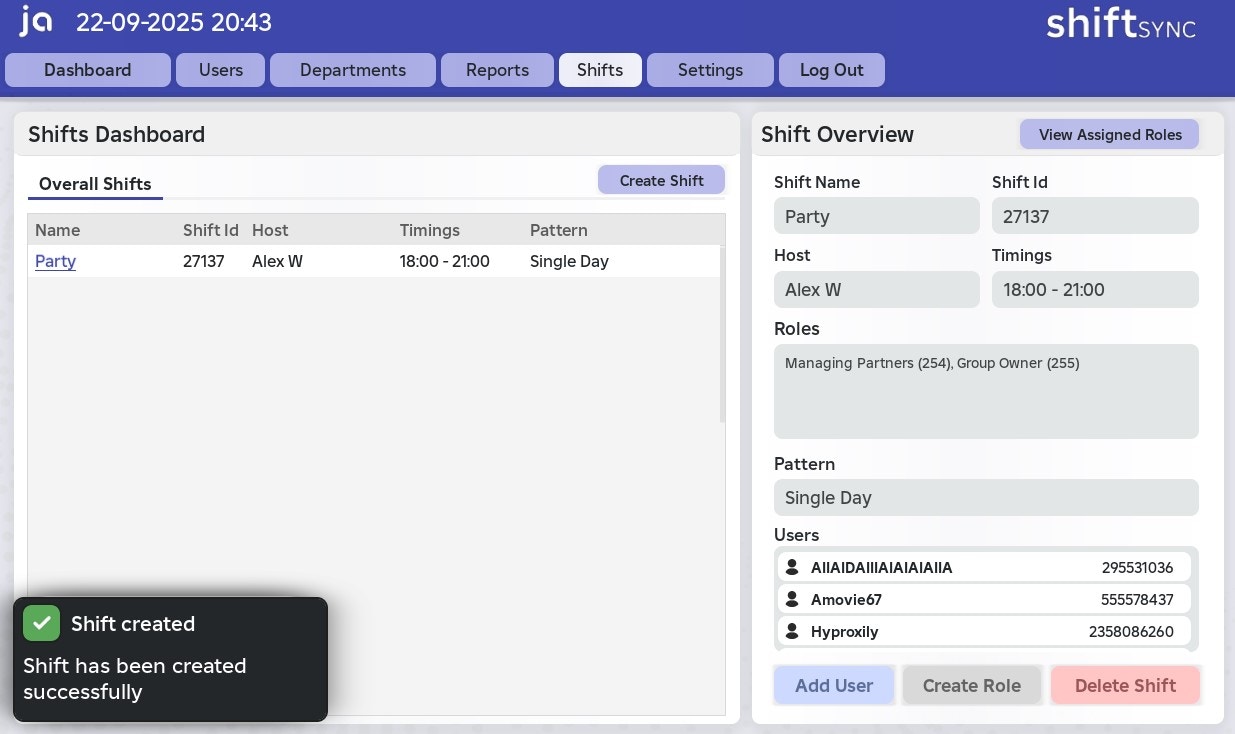
- Create Shift
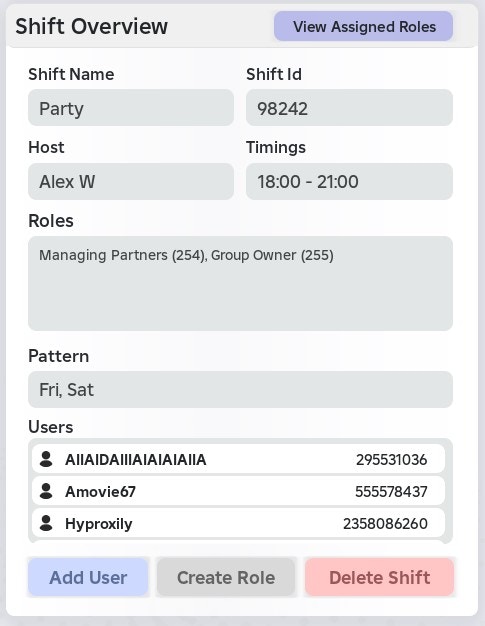
- Add User to Shift
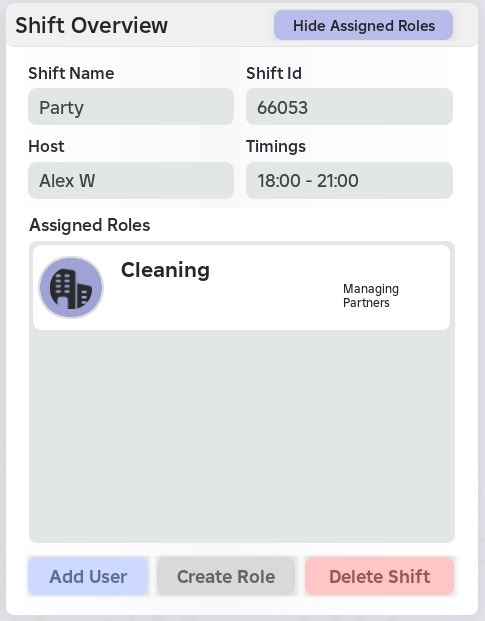
- Create Assignable Role
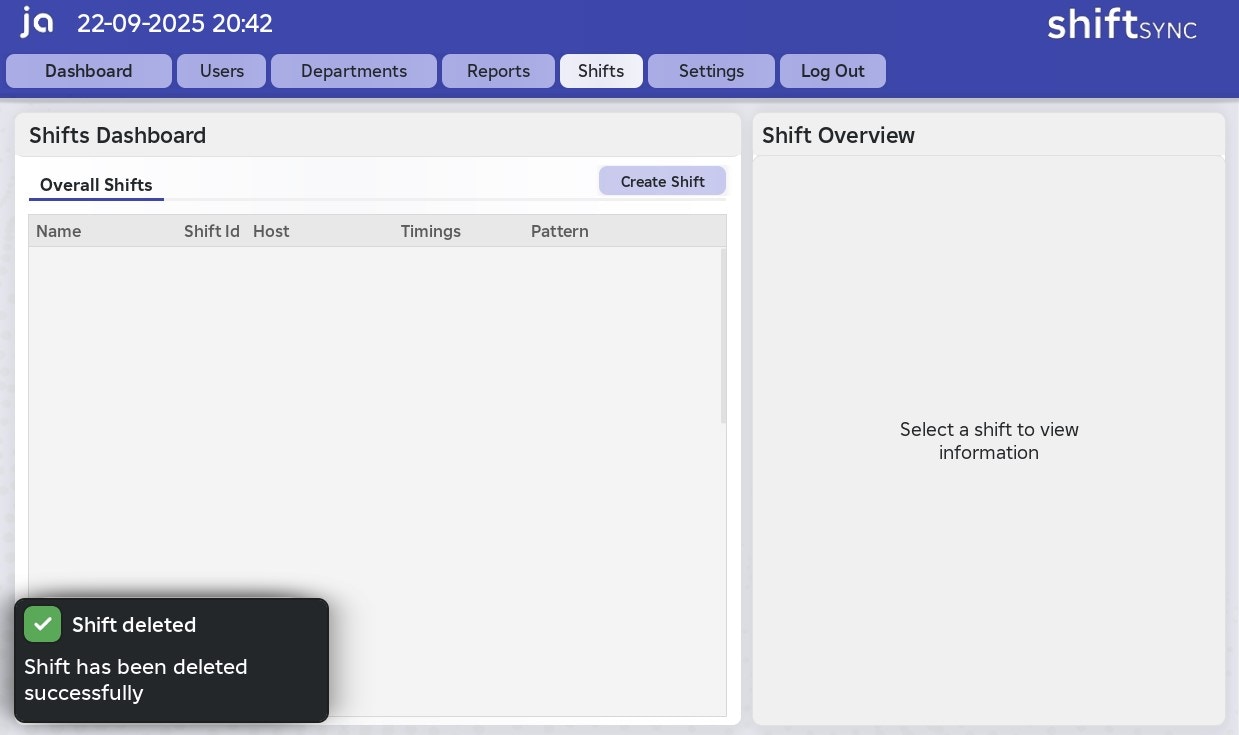
- Delete Shift
To create a shift, follow the steps below:
1
Enter shift name
You must provide a title for your shift. This can be anything you choose.
2
Select shift pattern
You can select the days for the shift to take place; however, this is optional. If no days are selected, the shift will appear as a Single Day, which can occur at any time.
3
Enter start and end time
You must enter a start and end time in the format
HH:MM4
Select group ranks
You can select group ranks fetched from your Roblox group. Users within these ranks will be automatically assigned to the shift.
Selecting group ranks is not mandatory, as you can also add users individually.
5
Enter host name
You must enter a host name. This does not need to be a Roblox username, and you may leave it as N/A if preferred.
6
Confirm creation
Once you have confirmed your shift, press Send Request, and the system will handle the rest
- After the shift is created, it will appear in the **Overall Shifts **tab on the left.
- The system will also notify you if the creation was successful.
7
All done
Congratulations, you have created a shift!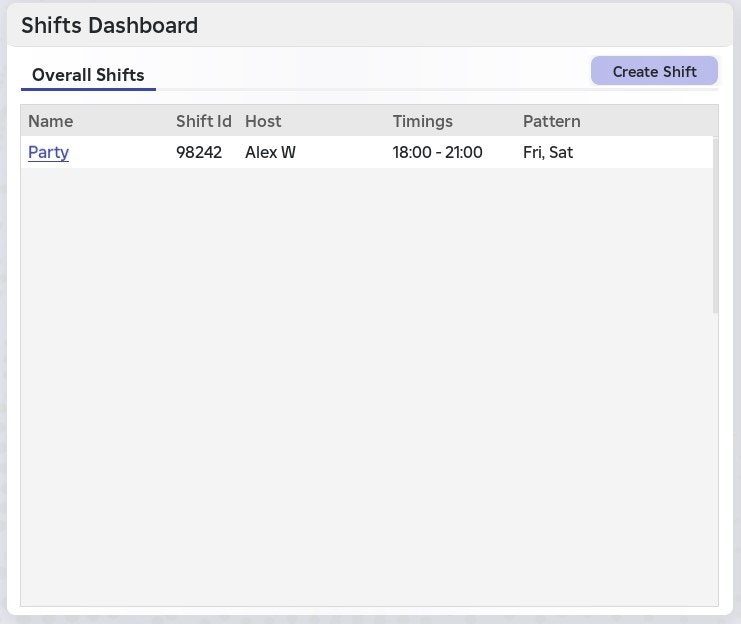
If the system catches an error during creation of the shift, you will be notified of the issue before the shift is created
Your Shifts
On the Home Page, you will be able to view your current shift- If you do not have any shifts, it will say “No more shifts today”
- If you have an upcoming shift today, it will say “**Shift starting at **
XX:XX” - If you are currently engaged in a shift, it will display the progress, and how many minutes are left
You can interact with the Current Shift button, which prompts the Your Shifts panelYour Shifts displays a summarised dashboard of any shifts you are assigned to, including other members on the shift
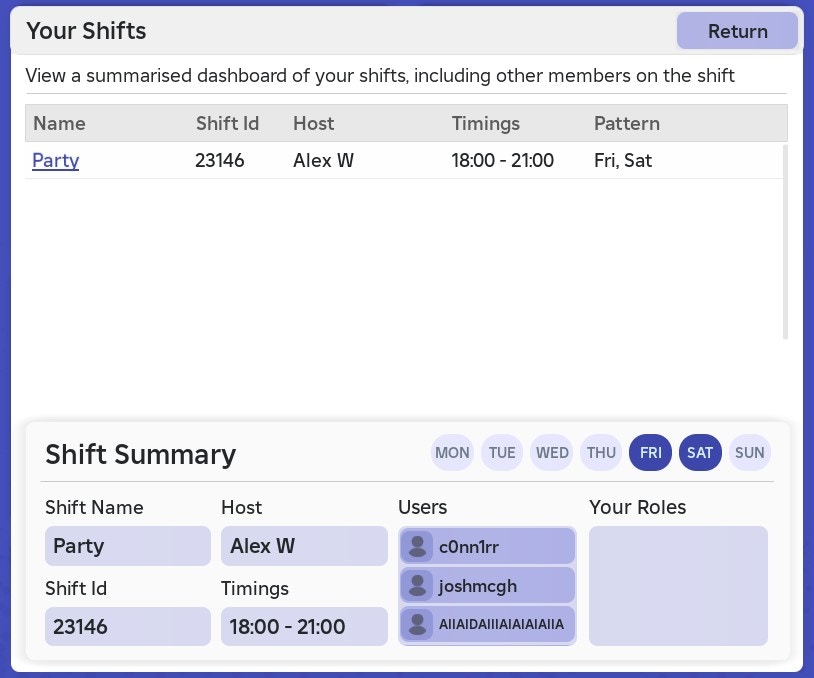
Shift Summary
The Shift Summary displays the shift pattern, shift name, shift ID, host, start and end times, a list of assigned users, and any assignable roles.